Remedial conservation aims to arrest the ongoing deterioration process of an art object, but it can create serious problems if it is not executed properly. This was noticed during a conservation project undertaken at a government museum in India’s state of Rajasthan. This paper endeavors to discuss the issue and describe the challenges faced during the conservation work on the paintings.
36. Remedial Conservation of Canvas Paintings: Issues and Challenges Due to Previous Treatments
- Anil Dwivedi, Project Associate, Conservation, Indira Gandhi National Centre for the Arts, New Delhi
- Achal Pandya, Head of Conservation, Indira Gandhi National Centre for the Arts, New Delhi
Introduction
In November 2017, the Government Museum of Rajasthan approached Indira Gandhi National Centre for the Arts (IGNCA) regarding the documentation and conservation of its collection in the Government Museum Alwar. This museum was established in 1940 in the city palace of Alwar and is spread over three halls. However, the collection is displayed in four galleries. The first gallery contains sculptures and inscriptions; the second gallery contains musical instruments, a natural history collection, and decorative items. The third gallery houses the unique collection of canvas paintings and manuscripts, and the fourth gallery is dedicated to arms and armor.
Alwar (a former principality) is a prominent city in the state of Rajasthan and is popularly known as the gateway to Rajasthan. The city is situated 160 kilometers southeast of New Delhi, the capital of India, and is part of the National Capital Region. In ancient times, this area was known as Matsya Mahajanpad; it is mentioned in the Buddhist text Anguttar Nikaya as being among sixteen Mahajanpadas. Bairath (present-day Viratnagar) was the capital of Matsya Desh (fig. 36.1).
The Alwar Museum is known for its unique, varied collection; it houses around fourteen thousand objects, including textiles, miniatures, rare books, canvas paintings, wooden objects, furniture, a natural history collection, metalwork, arms and armor, decorative art, and terracotta and stone objects. The collection also has twenty-six canvas paintings; twenty-four were on display at the time of our work, while two were kept in storage.
These paintings are excellent works made locally by artisans under the patronage of the Alwar maharajas. The founder of the kingdom didn’t have time to concentrate on arts and crafts, but his successors gave patronage to Dalchand, Baldev, and Saligram. Although Dalchand and Saligram came from Jaipur, they started the Alwar school of paintings in the eighteenth century. This school was developed from the Jaipur school of paintings and had a Mughal influence. Dalchand had worked in the Rajput style, and Baldev was expert in the Mughal school, so the amalgamation of these two styles gradually came to be known as the Alwar school of paintings.
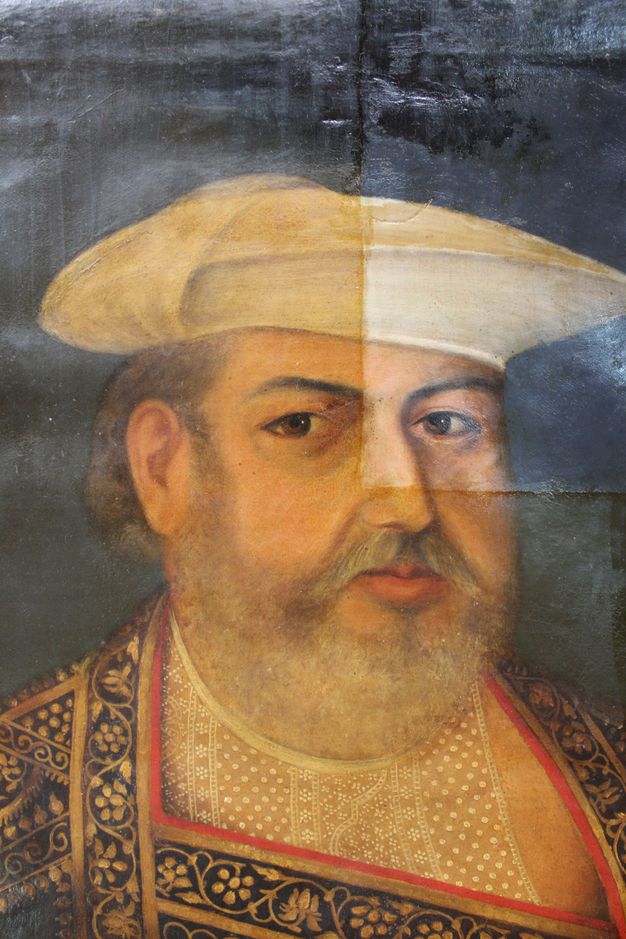
Maharaja Viney Singh was the greatest art enthusiast in the Alwar royal family tree and was himself a painter, calligrapher, and binder. During his time, Aga Mirza Khan was also a great calligrapher. Similarly, Natha Khan Darvesh and Abdul Rehman were expert in making figures and designs at the borders of paintings. The paintings displayed at the Alwar Museum were made during the reign of Maharaja Singh (1815–57) and have great historical significance (fig. 36.2).
The museum is located in what was once the Maharaja’s palace, which was converted for the task. Three large halls on the upper floor are dedicated to the display of objects. The canvas paintings that are the subject of this paper are displayed in gallery 3. The building has had various problems that arose since it was repurposed into a museum. Weather extremes and the overall condition of the building did not provide a suitable environment for the collection. For example, broken glass in a large window let biological agents into the galleries, and the activity of those agents caused problems that were noticed on the paintings during the documentation. Gaps between the walls and paintings had provided habitat for bats and other pests, and as a result the paintings had suffered paint losses and the disintegration of canvas due to bat excreta and other biological activity. The museum also had problems with leaks, leading to dampness on walls. This resulted in fungal infestations on the paintings.
Overall, paintings were exposed to many agents of deterioration: climatic conditions, negligence, and poor storage, as well as previous interventions. It was determined that all the paintings had been treated in the past. Also, the materials and methodology used in the treatment showed that all the paintings had been conserved by a single person and within the same timeframe. However, no conservation records could be found from the host institution.
The following problems were noticed on the paintings:
-
Bulging. The painting was lined without flattening. The unflattened area resulted in bulges, and this transferred to the paint layer.
-
Impression on image layer. Patches, used for mending, are visible on the paint layer.
-
Dark, yellowed varnish
-
Cutting of fold over edge
-
Overpaint or filling of losses spread over the image layer
-
Pasting of original canvas onto the strainer/stretcher
-
Presence of nails, thread, and other foreign material between the lining and original canvas
-
Problems due to improper storage, including tears and paint losses
Conservation Plan
It is impossible to undertake a satisfactory and ethical treatment without a good conservation plan. Conservation planning requires a thorough understanding of material and technique, and of the causes of deterioration in order to ethically conserve the artworks. Our conservation plan included the following phases:
-
Documentation. This is the method of understanding the cause of problems and determining the materials and techniques used in an artwork.
-
Deterioration. It is necessary to determine the nature of any deterioration, its cause, and the extent of damage for remedial conservation.
-
Treatment/remedial conservation. This is where satisfactory treatment is determined and applied based on the information derived from previous phases. In this phase, it is vital to keep in mind the principles of minimal intervention, compatibility, and reversibility.
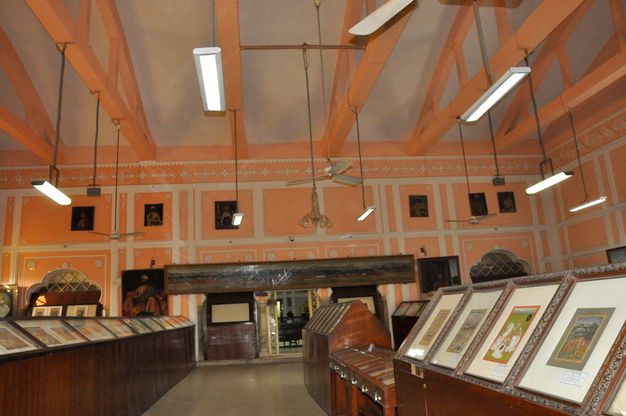
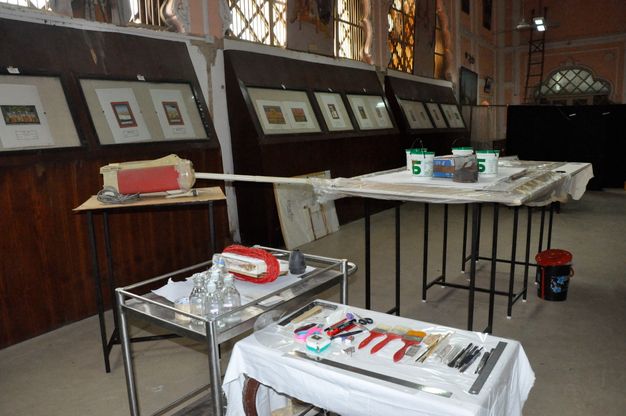
Museum administration asked us to undertake the work only in the museum. We were assigned space in gallery 3, which was converted into a temporary in situ studio (fig. 36.3). This was an open studio where visitors were allowed to interact and ask questions about the ongoing activities. The museum collection is public property; therefore, it is the public’s right to know what is happening to these collections. Keeping this in mind, we entertained any interested visitors.
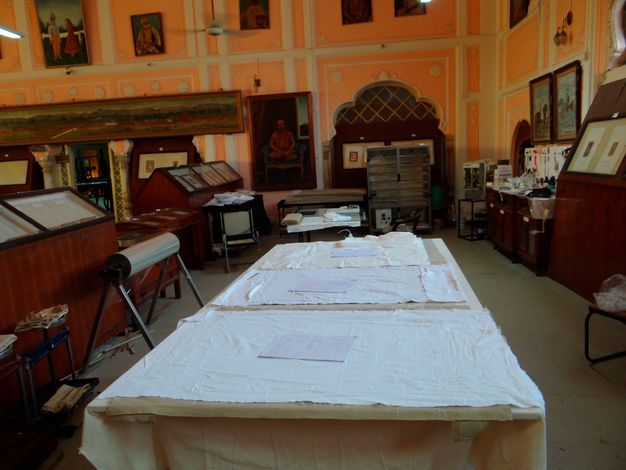
In formulating our conservation plan, we carried out a thorough initial study to understand the reasons behind the problems and study the techniques and art historical aspects of the paintings. Examinations done with visible, raking, transmitted, and UV light sources were used to retrieve information from the objects. Overpainted areas (hidden beneath the surface) were revealed using UV light.
After the documentation phase, we could definitively state that all the paintings had been treated in the past. In principle, whatever material is being used for a given conservation treatment should be reversible and compatible with the artworks. This approach was not applied in previous treatments, which meant that these treatments become one of the causes of deterioration. Past treatments included cleaning, patch mending, lining, filling, inpainting, and varnishing.
After finishing our detailed study, we decided on the following steps for treating the paintings:
-
Removal of varnish
-
Removal of previous lining
-
Removal of extra adhesive from the back of the painting
-
Flattening to remove the bulges
-
Removal of patches. realignment of tears, and mending
-
Strip-lining or lining as needed on a case-by-case basis
-
Loose-lining
-
Filling and inpainting
-
Varnishing
Problems Due to Past Treatments and Their Subsequent Remedies
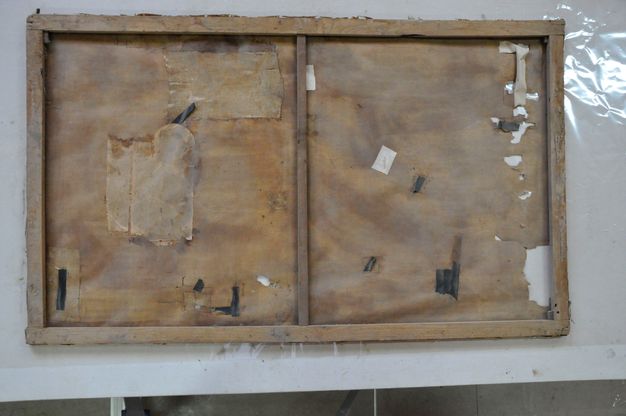
Patch Mending
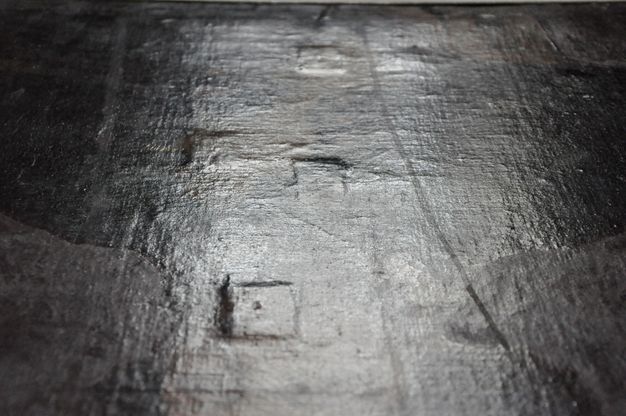
Patches were found in abundance on almost all the paintings. Three phases of patch mending were found: one on the original support, one on the lining canvas, and sometimes a third patch on the patch applied to the lining canvas. The material of the patch was cotton, but in some cases electrical tape or paper was also used for mending purposes (fig. 36.4), and these were applied without removing older patches. The mending itself caused problems in some paintings. The dimension of each patch was larger than the tear it addressed, and the density of cloth greater than that of the original canvas, causing these patches to be clearly visible on the image layer and leading to problems in the paint layer (fig. 36.5).
Our approach involved first carefully removing all the patches and cleaning off the adhesive properly, using acetone. This was easy, as the used adhesive had become brittle and lost adhesion. Then a thin film of Beva 371 was laid onto fine muslin cloth; after drying, this film was used for mending. Tears were aligned properly, and the film was applied with the help of heat and pressure. The thickness of the applied film was less than that of the original canvas, so this treatment should not create any problems in the future. If the mend shows some irregularity, it can easily be removed without damaging the original artwork.
Lining
All but three paintings were lined. Two kinds of glue (glue paste and wax resin) had been used as an adhesive for lining purposes. Necessary precautions had not been taken while lining the painting in the past, and, as a result, air was trapped between the original and lining canvases. This led to a separation of the lining canvas from the original and caused other structural problems, including local detachment, opening of the lining, and other surface problems.
Lining is a major intervention to an artwork. It may alter the appearance of the painting, for example, color change, flattening of impasto, and impregnation of the painting with the lining adhesive. These risks are the reasons that lining is considered a maximum intervention and should be practiced only as a last remedy.
The following problems were noticed in the previously lined paintings:
-
Air pockets between original canvas and lining canvas
-
Presence of foreign material between original canvas and lining canvas
-
Lining executed without flattening of canvas
These issues led to delining, bulging, and loss of paint layer.
After removing the linings, we found that the original canvas was stable, although tears and holes were evident. Seeing the condition of the canvas, we decided not to line the majority of the paintings.
Because the paintings were at serious risk and all required structural treatment to stop the ongoing deterioration process, we began by removing them from their stretchers/strainers and then removing the lining canvas. At that point, we found that most of the original canvases were in sound condition, except for three in which the canvas had deteriorated and was no longer able to support the weight of the image layer.
The principle of minimal intervention was followed for the paintings in which the canvas was found in good condition. Most of these paintings did not have the fold-over edge; it is possible those edges had been removed to trim the paintings. Strip-lining was decided for these paintings where the canvas was in stable condition.
In some paintings, the original canvas was folded over the stretcher. We decided to reveal the folded canvas in these cases, increasing the size of the painting. However, the curator resisted this idea because it would create a discrepancy in museum documentation. We explained to the curator that for ethical reasons the original paint layer should be revealed. Finally, the new size was accepted by the museum, which justified its decision on the grounds that during the conservation treatment the original paint layer was revealed to have larger dimensions than those previously recorded.
As mentioned, three paintings needed to be lined, as the original canvases were not in good enough condition to hold the image layer. A lack of equipment made lining on-site difficult. Nonetheless, we lined the paintings on a makeshift suction table using vacuum pressure (fig. 36.6). The adhesive used for lining was Beva 371. Lining was carried out in a vacuum envelope, and the heat was applied using an iron.
Cleaning
Cleaning means removal of all the material that is adhered on the paint surface and whatever appears on the surface due to degradation. The details of the paintings had become obscured due to darkened varnish and dust and dirt accumulated on the surface. Changes to the color of the paintings also caused them to lose their three-dimensional effect. The paintings had dust and dirt, stains, paint splashes, and oxidized varnish on the surface. In addition, biological activity was noticed on the painting’s surface as well as on the verso. Therefore, it was important to clean the surface both to reveal the image and to stop further decay of the artworks.
We considered a series of questions before starting the cleaning process. This exercise assures the integrity of the artwork and the ethical approach to cleaning the painting’s surface.
-
What is foreign material?
-
Is it dirt?
-
Is it damaging? If yes, what will be the extent of cleaning?
-
Is cleaning necessary?
-
Can the painting survive the cleaning process?
-
What will be the effect of cleaning?
-
What will be the object’s appearance after cleaning?
-
Will the stability of the object be affected?
-
How can you clean the object?
-
Is there a suitable treatment?
-
How does the treatment work?
-
Is the treatment safe for both the object and us?
-
At what point should we stop?
After assessing these questions and their consequences, the cleaning was carried out. After discussion with the curator, it was decided to fully clean the paintings. The cleaning was done to address the dust and dirt and to remove yellowed/darkened varnish, overpaint, and other foreign material from the surface. Tests were carried out on small areas using solvents of increasing strength—starting with saliva and progressing through alcohol to ketones to a solution of aliphatic solvents and, finally, to a solution of aromatic solvents—to find a solvent that could remove the varnish and overpaint and other unwanted material from the surface without harming the original paint film. Once the solvent was determined, a cleaning safety margin test was carried out with the selected solvent to ensure it would not affect the stability of the colors present in the painting.
The aromatic solvents yielded fantastic results, but the same result was achieved with polar solvents by increasing the reaction time. Hence, the varnish removal was done using acetone and isopropyl alcohol (fig. 36.7).
Consolidation
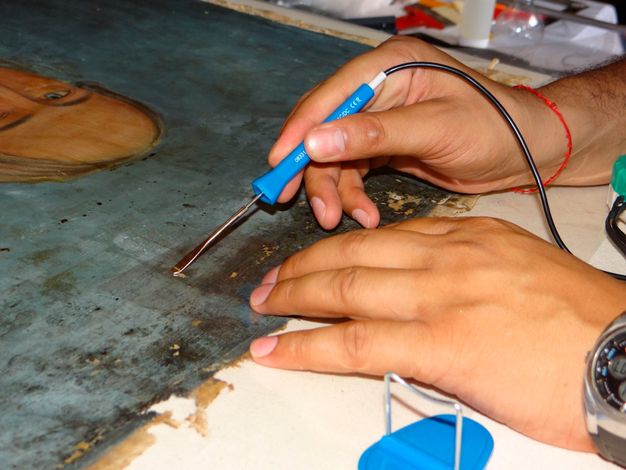
The term consolidation is used to describe the application of adhesion between loose layers of a painting that are separated from the ground. Generally, this is done to stabilize problems such as flaking, cupping, powdering, and blisters. Consolidation can be executed from the back (maximum intervention) or on the front, only to affected areas (local application). Preference was given to local consolidation in line with the principle of minimal intervention. Beva 371 was applied on affected areas using a small brush and later settled with a hot spatula (fig. 36.8).
Restretching
After completion of the structural work, the paintings were restretched. A strip of Tyvek was added at the tacking margin to avoid direct contact between nails and the original support. Loose-lining (also with Tyvek) was provided to give extra strength to the original canvas. This was done from the back to protect the painting from moisture, dust, and dirt, and to prevent future biological activity behind the canvas. Except for the paintings that were restored to their earlier dimensions, the same stretchers/strainers were used for restretching the paintings after stabilization.
Filling and Texturing
It was necessary to reintegrate lacunae after restretching the paintings. It was important to fill the gaps to restore continuity and aesthetics in the image layer. Various methods are used for filling on canvas paintings. We used a traditional method of filling with a mixture of French chalk, kaolin, pigment, and PVA emulsion. This material was used to fill the lacunae using brush and spatula. Fills required texturing similar to the surrounding area. Inpainting without texturing does not match and looks out of place.
Retouching
Retouching originally meant corrections or changes made by an artist as final adjustments to the artwork. Nowadays, retouching is sometimes considered to be synonymous with inpainting. To us, retouching means the last step of painting conservation—one that is required to please museum visitors and to accurately reflect the artist’s original intentions. This is normally at least a two-step process. It is necessary to conserve the painting to stabilize it and stop the ongoing deterioration process, but a painting can survive without retouching for a longer time. However, ground color correction is required for aesthetic reasons to allow the painting to be appreciated.
The retouching was carried out using pigment and Paraloid B72 as a medium. Before any retouching was done, a layer of Paraloid B72 was applied to the fill areas to ensure the reversibility of the retouching.
Conclusion
After the remedial conservation, the paintings were well stabilized and could once again be appreciated by visitors. The colors that had been hidden by dark varnish are now visible. The ongoing structural problems of the paintings have been stabilized, and there are no longer unstable areas that will lead to further deterioration.
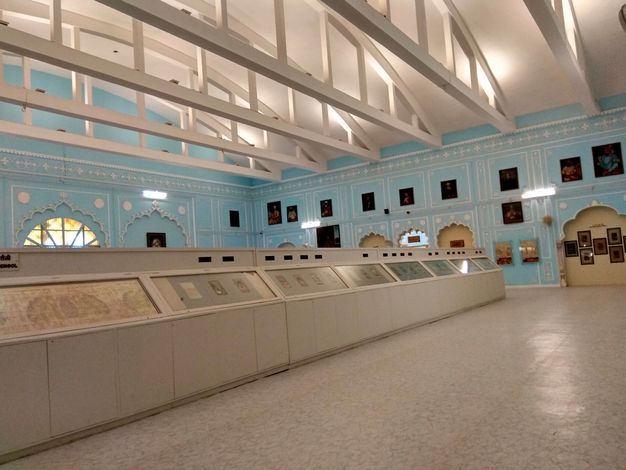
During this project, we also trained the museum staff, students, and conservation professionals of that region through workshops. The workshop titled Conservation and Documentation of Oil Paintings was conducted in collaboration with SRAL, in the Netherlands, under the leadership of Kate Seymour. The paintings conservation project was completed in eighteen months’ time. In addition to the paintings, the museum got a new look through a complete renovation, and conservation of the entire collection was done as well, including documentation. The paintings we restored are now displayed in the same location and can be viewed in a far better state and appreciated anew (fig. 36.9).
Acknowledgments
I wrote this paper under the guidance of Dr. Sachchidanand Joshi, IGNCA. I owe my gratitude to him for his valuable suggestions in the preparation of this report. I am also thankful to Hridesh Kumar Sharma, director of archaeology, and Pratibha Yadav, curator, Government Museum, Alwar, for allowing me to work on the paintings and write a paper on the subject. I am deeply indebted to René Hoppenbrouwers and Kate Seymour for their support and guidance in leading the training program at Alwar. I am also grateful to my colleagues and fellow project associates at IGNCA: Anil Verma, Jitender Chauhan, and Kirti Pal Singh Parmar, thank you for your consistent support and help.